
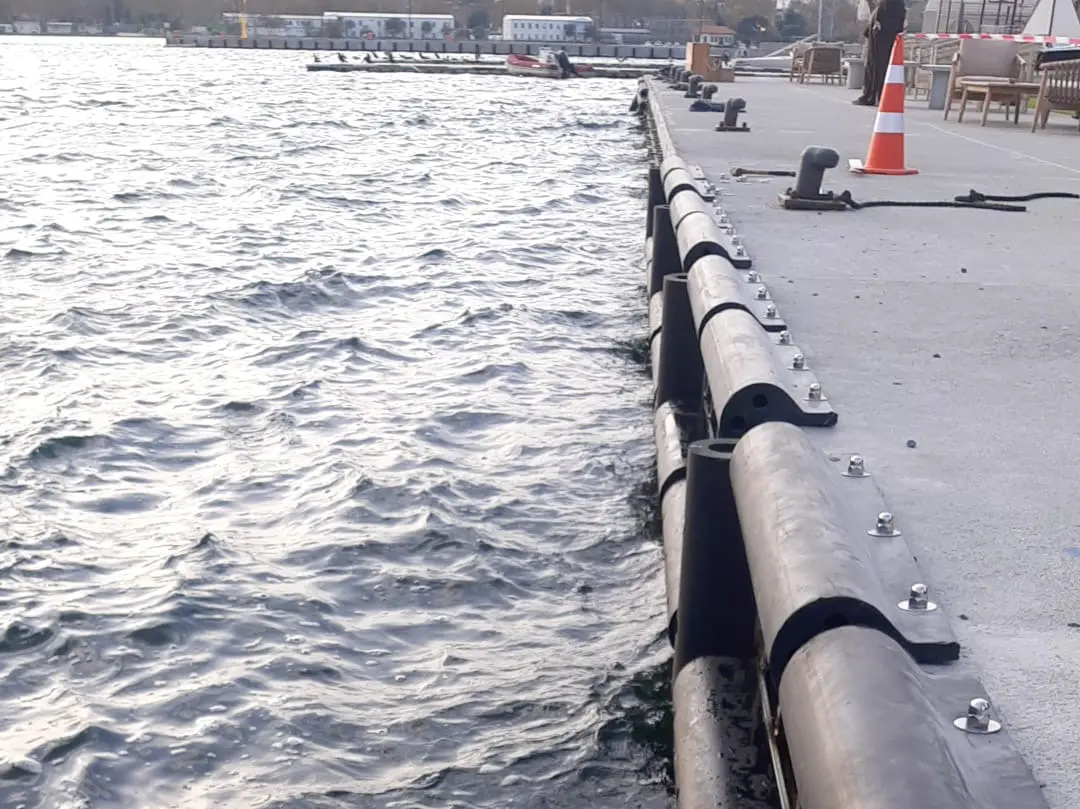
D-type rubber fenders are extruded profiles with a square outer section and a D-shaped internal cavity that collapses under load to absorb berthing energy. They are widely specified for quays, jetties, marinas, and industrial loading docks, combining a compact footprint with predictable, cushioned deflection. Selecting the right compound and cross-section is only half the job: a D-type rubber fender installation that skips proper surface preparation, alignment, or fixing torque will underperform regardless of rubber quality, so the fitting sequence deserves the same attention as the specification itself.
This guide sets out a practical sequence for how to install D-type rubber fenders on concrete and steel dock structures, along with the fixing details that determine long-term service life.
Step 1: Inspect the Mounting Surface
Before any fender touches the structure, check the mounting face:
- Flatness: Ensure no more than a few millimetres of deviation across the fender’s contact length.
- Concrete faces: Must be free of spalling, corrosion staining, or exposed reinforcement.
- Steel faces: Must be free of weld splatter, coating damage, or projecting fixings that would prevent even contact.
- Surface repairs: Any irregularity should be ground back or packed out before continuing.
Uneven contact concentrates load on isolated points of the D-section rather than spreading it across the full bearing area, accelerating local wear.
Step 2: Position and Align the Fender
Marking out correctly is what makes dock and quay wall fender fixing repeatable along a full berth line.
- Set fender elevation against the vessel types using the berth, allowing for tidal range where relevant.
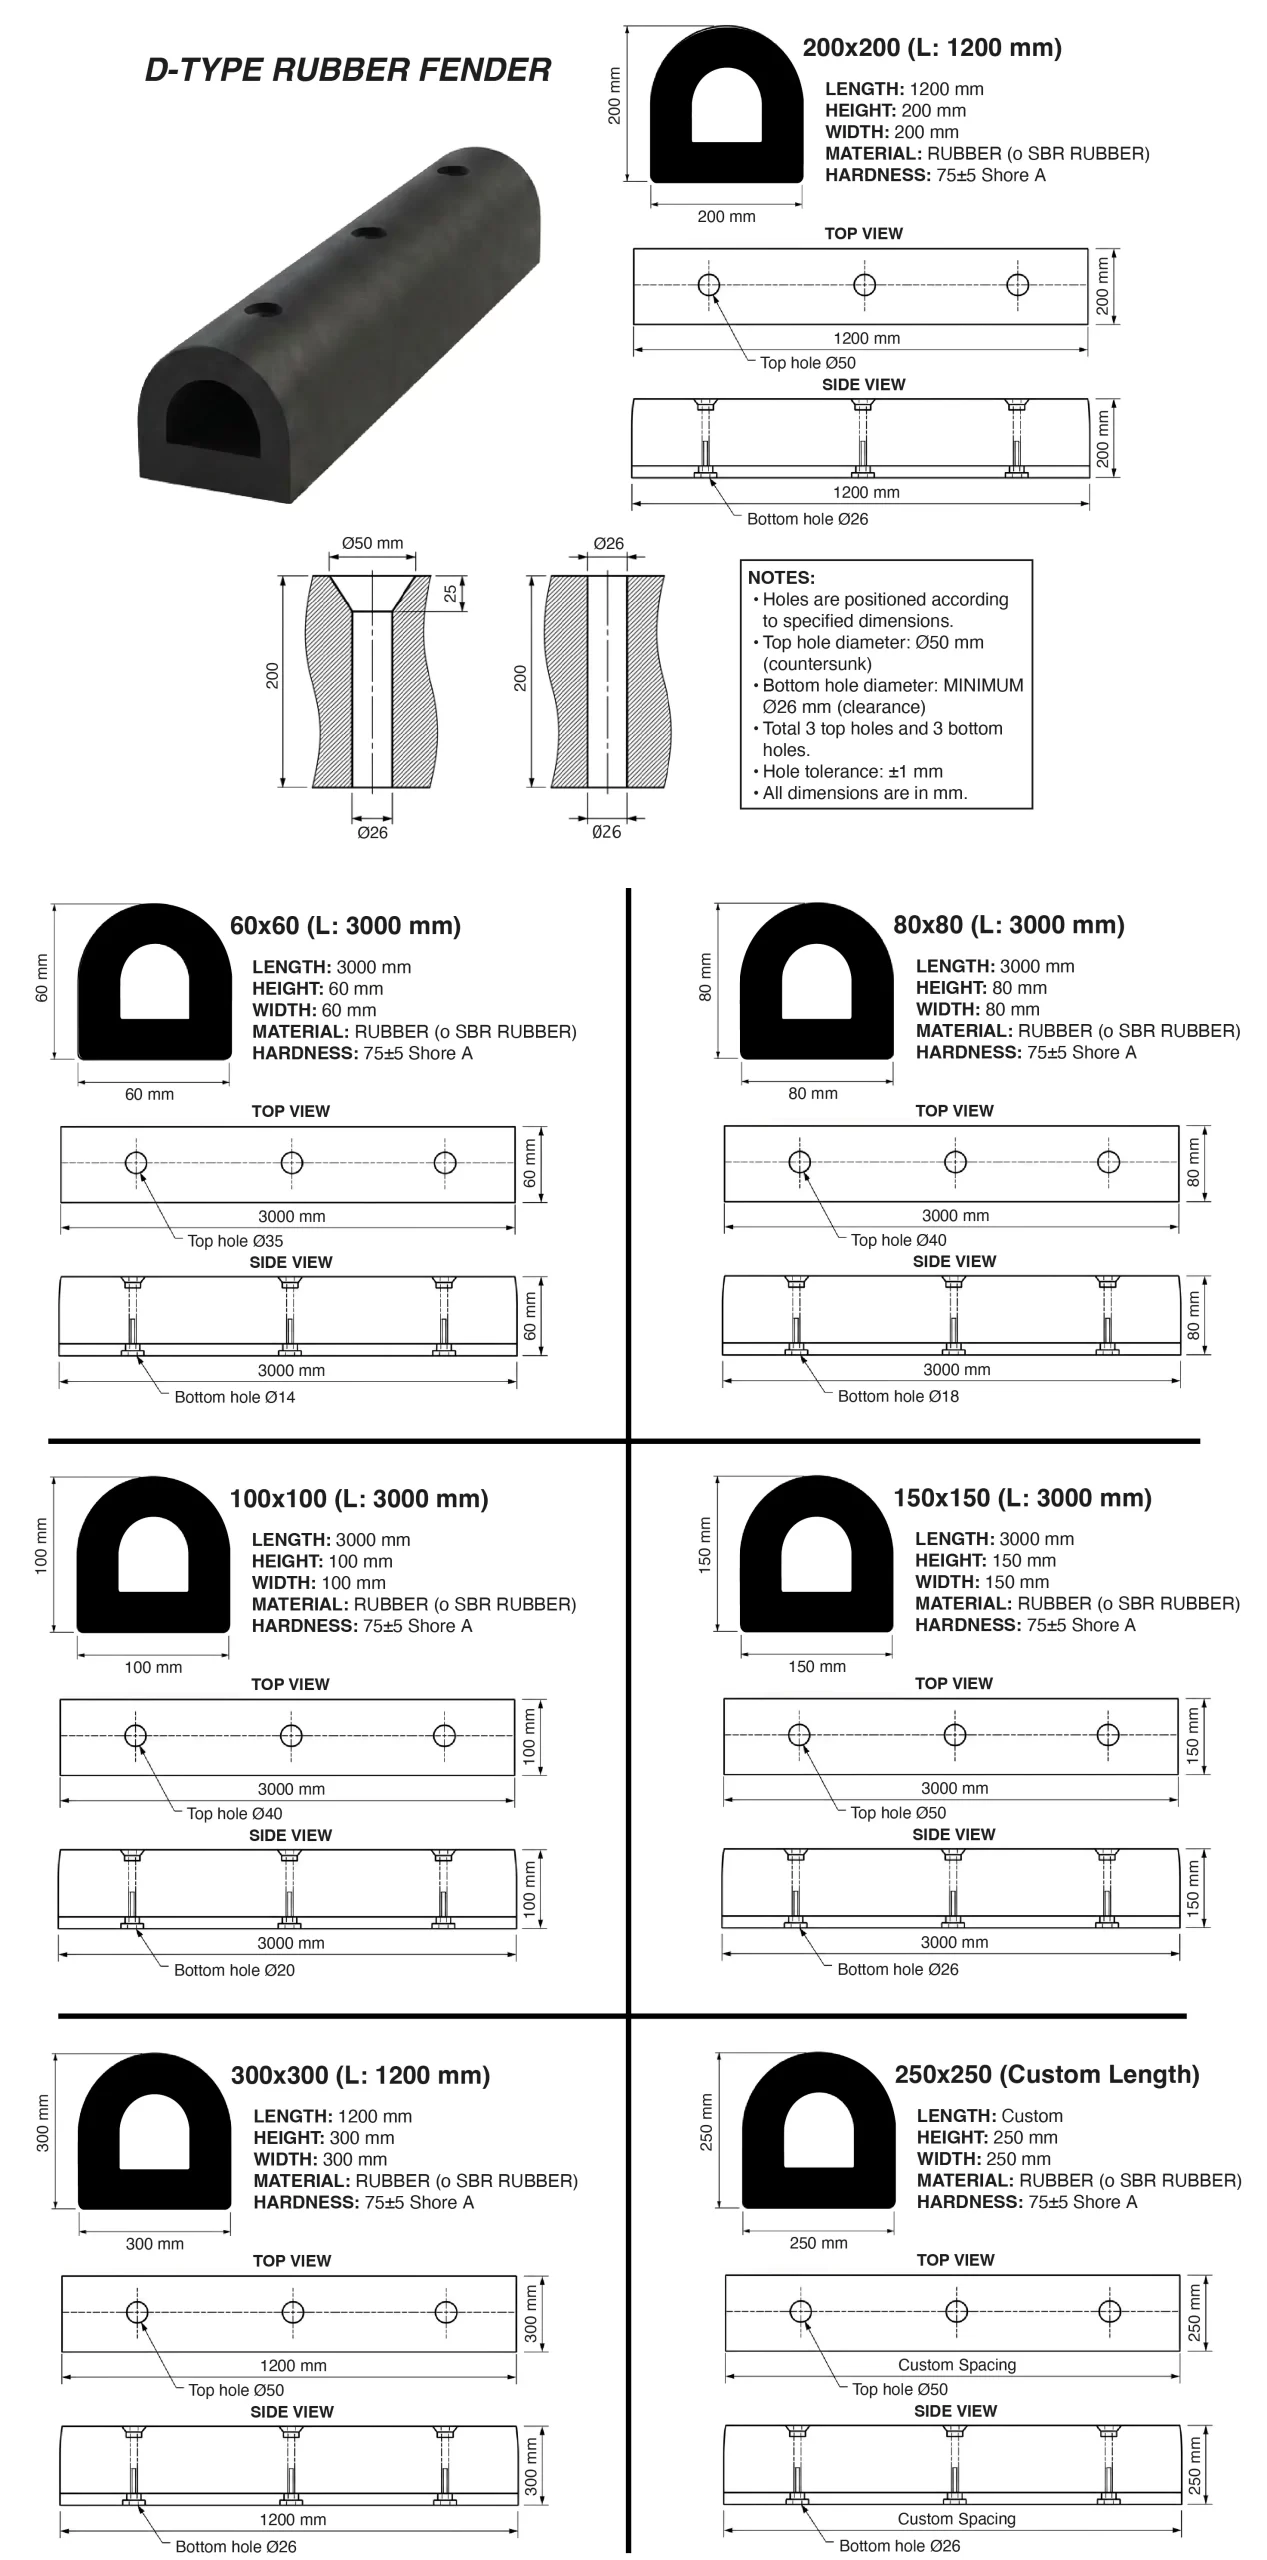
- Confirm hole centres against the factory-drilled pattern before marking the structure — 200 x 200 mm D-type fenders, for example, are typically supplied with 800 mm or 1,200 mm hole centres.
- Keep spacing between adjacent lengths consistent so impact coverage runs continuously.
- Confirm orientation (horizontal vs vertical rubber fender mounting) against the layout drawing before drilling.
Step 3: Prepare the Anchor Holes
Hole preparation is where many D-section dock bumper installations go wrong.
- Drill anchor holes to the diameter and depth specified for the anchor bolt system — a 200 x 200 mm profile typically needs a countersunk Ø50 mm top hole and a minimum Ø26 mm through-hole for an M24 bolt.
- Work to a tolerance of around ±1 mm on hole position to keep the clamping plate seated square.
- Clear all drilling dust and debris; residue weakens adhesive or expansion-anchor grip.
- Steel structures usually need a different mechanical fixing than concrete, such as through-bolting with backing plates or captive nut plates welded to the reverse face — confirm the method suits the substrate before drilling.
Step 4: Handle and Position the Fender Safely
Rubber fenders are resilient in service but vulnerable to handling damage before they are fixed.
- Use slings or lifting straps rated for the fender’s weight; avoid unjacketed wire cables, which can cut into the rubber surface under tension.
- Keep sharp tools and chain hoists away from direct contact with the profile.
- Support the full length while lifting to stop it bending or twisting under its own weight.
- Bring it into position with pre-marked holes aligned before inserting fixings.
Step 5: Assemble the Fixing System
The fixing hardware turns rubber fender clamping plates and washers into a system that distributes impact loads back into the structure.
- Anchor bolts carry the tensile and shear load into the substrate and must match the specified grade and diameter — M24 is common for 200 x 200 mm sections.
- Nuts should be corrosion-resistant, stainless steel or hot-dip galvanised, given the marine exposure.
- Large-diameter washers or steel clamping plates sit between the nut and the rubber face. Because rubber is elastic and compressible, a standard washer concentrates clamping force into a small area and cuts into the surface over time. A large washer or plate spreads that force across a wider area, keeping compression even and protecting the fender’s working life.
Step 6: Tighten the Bolts Gradually
Never fully tighten one bolt before moving to the next. Fit every bolt loosely first, check that the fender sits square and flush, then tighten in a staged sequence, working diagonally across the bolt pattern much like torquing a wheel or flange. This uniform approach stops one side compressing more than the other, which would otherwise pull the profile out of alignment or over-stress the rubber locally.
Step 7: Carry Out a Final Inspection
Once the bolts are torqued, run through a final check:
- Bolt tightness: Ensure all bolts are secure, with none having backed off while adjacent fixings were tightened.
- Deformation checks: Confirm there is no uneven rubber deformation, which can indicate an unlevel surface or uneven torque.
- Hardware positioning: Check that washers and clamping plates are flush and square, not tilted or recessed.
- Corrosion protection: Verify there is no coating damage on exposed anchor points from installation.
- Surface contact: Ensure full surface contact between fender and structure along its length.
Orientation and Fixing Mechanics That Affect Performance
Horizontal vs Vertical Mounting
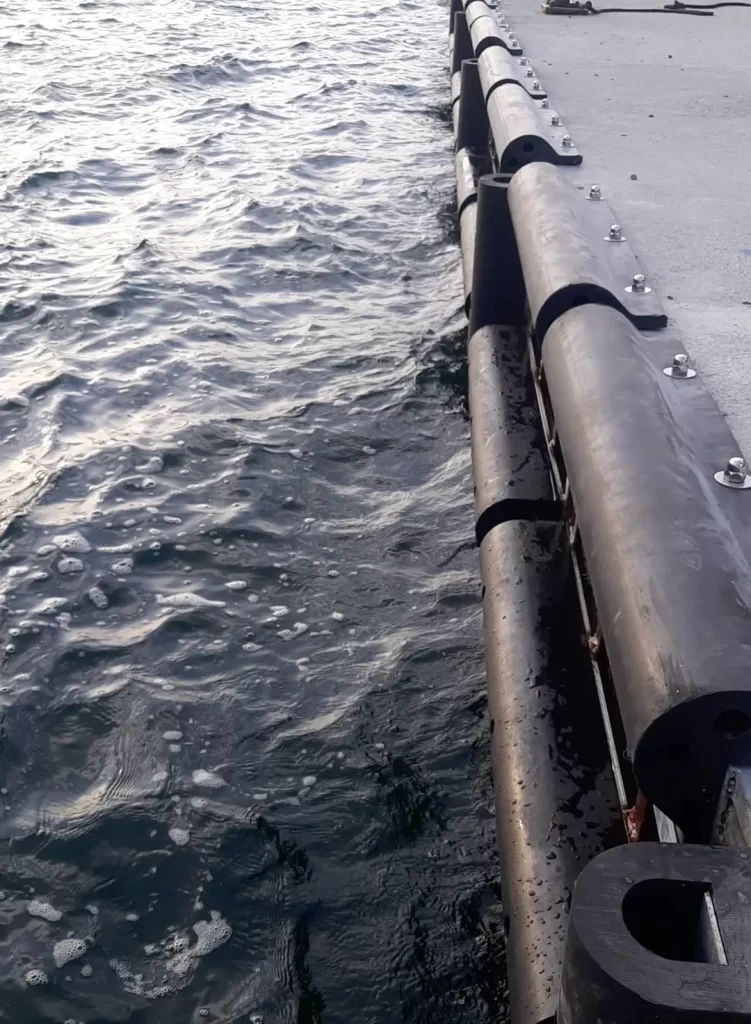
Mounting orientation depends on the berth’s operating conditions rather than preference. Horizontal runs suit berths with significant tidal variation or varied vessel freeboard, presenting a continuous contact band regardless of water level. Vertical mounting suits berths where vessels approach at a consistent, known contact height, or where quay geometry — corners, narrow piers, mitred returns — makes a continuous horizontal run impractical.
Washer and Clamping Plate Sizing
Hardware sizing is not a detail to trim for cost. Undersized hardware transfers clamping force into a smaller footprint on an elastic material, and over time the rubber deforms around the washer edge, loosening the fixing and letting the fender shift under impact. Sizing hardware to the bolt diameter and fender cross-section keeps the load spread evenly across the rubber face.
Common Installation Errors to Avoid
- Misaligned anchor holes that force the fender out of square during fitting.
- Undersized washers that concentrate clamping force and cut into the rubber.
- Overtightening bolts unevenly, causing localised compression and premature wear.
- Fitting onto an unlevel or unprepared surface, leaving gaps behind the fender body.
- Mixing incompatible bolt and nut materials, leading to galvanic corrosion in marine conditions.
Getting Long-Term Performance from Your Fender System
Fender longevity depends as much on installation quality as on compound selection. A correctly specified D-type profile fitted with misaligned holes, undersized washers, or uneven bolt tightening will wear unevenly and lose its protective function long before the rubber itself degrades. Consistent surface preparation, alignment, and fixing — best practice for fitting D-type dock fenders — is what separates a fender system that lasts from one that needs early replacement. For non-standard dimensions, hole layouts, or corner geometry, Rubbersan produces custom D-type rubber fenders to match specific berth requirements, alongside its standard extruded range.